
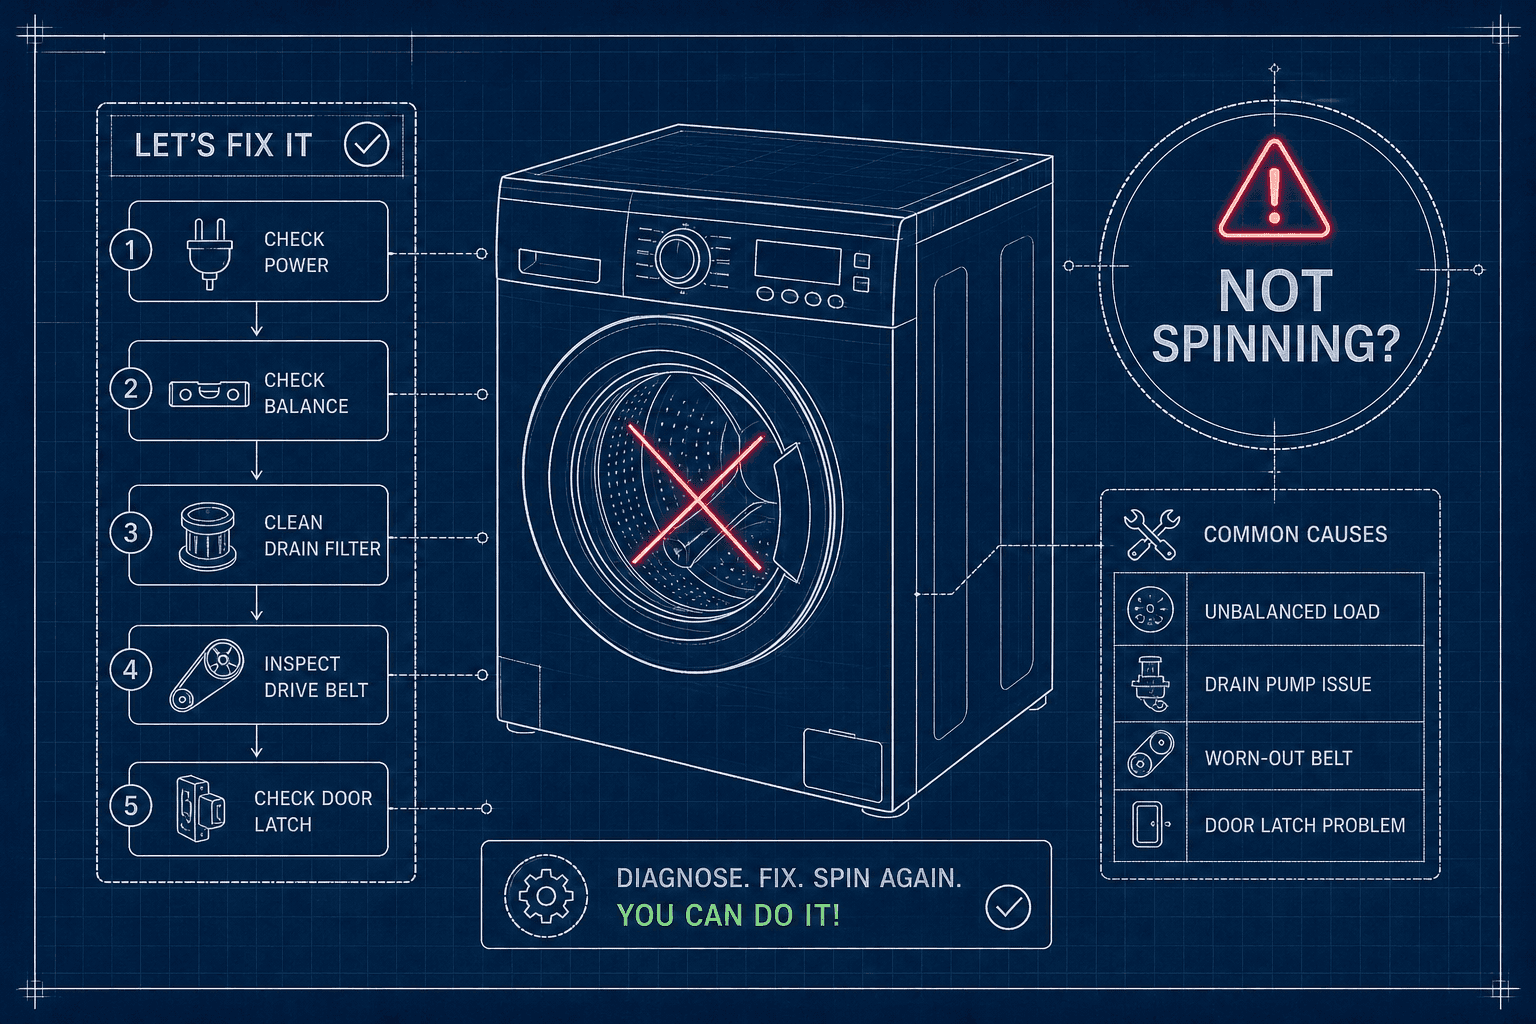
You pull open the door and the clothes are wringing wet. The machine ran, made all the right noises, and then stopped before finishing the spin cycle. Now you've got a drum full of soaking laundry and no idea why. A washing machine not spinning properly is one of those faults that feels serious until you know where to look, and in most cases, the cause is one of a short list of well-known culprits.
A washing machine not spinning tends to come down to a handful of likely causes, most of which you can check yourself in under twenty minutes. The approach here mirrors what a certified engineer runs through on every call-out: start with the simple stuff, work toward the mechanical, and know exactly when to stop and hand it over. That's the structure this guide follows, so work through it in order before you start pulling panels off.
Start here: the quick checks that fix most washing machine not spinning problems
Before suspecting a mechanical fault, check the basics. The majority of "washer won't spin" calls trace back to something the homeowner can sort out without tools.
Is the load unbalanced or overloaded?
Modern washing machines have sensors that monitor drum movement during the spin cycle. When the load is unevenly distributed, the drum starts to wobble, the machine detects the imbalance, and it cuts the spin for safety. A single heavy item, a large bath mat, a thick duvet, or a clump of jeans bunched to one side, causes exactly the same problem as an overstuffed drum. The machine isn't broken; it's protecting itself.
To fix it: pause the cycle, open the door, and redistribute the clothes so the weight is spread evenly around the drum. If the machine is packed solid, remove a few items and set them aside. Mixing large and small items in the same load helps maintain balance going forward. Once redistributed, restart the spin cycle and see if it completes normally.
Wrong cycle setting or spin speed selected
A spin cycle that "isn't working" is sometimes working exactly as intended. Delicate, hand-wash, and wool programmes are designed to spin slowly or to skip high-speed spinning entirely. Clothes coming out noticeably wetter than usual after one of these cycles isn't a fault; it's the programme doing what it should. Check the selected cycle before assuming there's a problem, and switch to a standard cotton or synthetics programme to test.
Too much detergent causing excess suds
Using too much detergent, or a standard detergent in a machine designed for HE (high-efficiency) products, can generate excessive suds that interfere with both draining and spinning. The machine senses that water hasn't cleared the drum properly and pauses the spin to protect itself. If you notice a soapy residue or more foam than usual during a cycle, try reducing your detergent dose and running a rinse-and-spin cycle to clear the drum.
Door or lid not latching properly
Every washing machine has a safety interlock that prevents it from spinning unless it detects the door or lid as fully closed. If the latch is worn, slightly misaligned, or the door switch has failed, the machine won't advance to spin regardless of what cycle you select. Test it by firmly pressing the door shut and listening for the click of the lock engaging. If the machine still won't spin, or if the door closes but doesn't feel solid, the door lock assembly may need replacing.
How blocked drainage stops the spin cycle
This is the connection many homeowners miss: a washing machine that isn't draining properly will also refuse to spin. Most modern machines use sensors to confirm the drum is empty before allowing high-speed spinning. If water is still sitting in the drum, the machine pauses the cycle and waits. The spin cycle isn't broken; the drainage is.
Checking the pump filter on a front-loader
The pump filter on a front-load washer catches coins, buttons, lint, and small items before they reach the pump. When it's clogged, water can't drain and the spin cycle stalls. Clearing it is straightforward. Here's how:
- Unplug the machine from the mains.
- Lay towels on the floor and place a shallow tray in front of the access panel on the lower front of the machine.
- Open the panel and pull out the small drain hose if one is present, letting residual water drain into the tray.
- Slowly turn the filter cap counterclockwise, opening it gradually to release any remaining water.
- Remove debris by hand, rinse the filter under the tap, and wipe out the housing.
- Screw the filter back in clockwise until snug, refit the panel, and run a short drain and spin cycle to confirm drainage is normal.
For model-specific instructions on cleaning the pump filter on a front-load washer, check the manufacturer's guidance before you start.
If the machine still doesn't drain after cleaning the filter, or if the pump makes grinding or rattling noises during the drain cycle, the pump itself may be failing rather than just blocked.
Top-load washers: filter and pump access
Top-load washers don't have a front-panel filter in the same location, but the principle is the same. Many top-loaders have a lint filter inside the drum agitator or along the drum rim, check your model's manual for its location. The drain pump is typically accessed from the rear or bottom panel. If water is pooling and the spin stalls, the same drain-and-pump logic applies: clear the filter, check the hose for kinks, and confirm the pump isn't obstructed before moving to mechanical checks.
Inspecting the waste hose for kinks or blockages
Pull the machine slightly away from the wall and inspect the waste hose running to the standpipe or sink. Look for kinks, sharp bends, or crushing where the hose passes behind the machine. A hose pushed too far into the standpipe can also create a siphoning problem that prevents proper drainage. Straighten any kinks, reposition the hose correctly, and run a drain cycle to confirm the issue is resolved.
Reading the warning signs of a mechanical fault
Once you've ruled out load balance, cycle settings, door latching, and drainage, you're moving into mechanical territory. These faults typically involve worn or broken components that require a trained engineer to replace safely, but knowing what the symptoms mean helps you describe the fault accurately and make a more informed decision about next steps.
Burning smell and a drum that won't move
A burning rubber smell commonly points to the drive belt. When the drum is overloaded or something jams it, the motor keeps trying to turn while the belt slips against the pulley, generating heat and that characteristic smell. A similar smell can also come from a slipping clutch or other mechanical friction, so pay attention to whether the drum is completely still or still attempting to turn, that distinction helps narrow the cause. A belt that's been slipping repeatedly will eventually stretch or snap. This is different from an electrical burning smell, which is sharper, more acrid, and suggests the motor or wiring rather than the belt.
Grinding or roaring that gets worse under load
A low rumble or grinding noise that intensifies as spin speed increases is a classic sign of worn drum bearings. The bearings support the drum shaft, and when they wear down, the drum develops rough, noisy movement under load. You can do a quick check: unplug the machine, open the door, and spin the drum by hand. Rough resistance, a grinding sensation, or visible play in the drum all suggest bearing wear. This tends to get progressively worse and won't fix itself.
Slow spin, slipping, or consistently wet clothes
If the machine attempts the spin cycle, builds some speed, then stalls or falls short of full spin, the likely cause is worn carbon brushes or a failing motor clutch. Unlike a load imbalance, this happens consistently regardless of what's in the drum. The machine isn't stopping because the load is uneven; it's stopping because it can't sustain power through the spin cycle.
Drive belt, carbon brushes and motor faults explained
Understanding what these parts do helps you match symptoms to causes accurately, and it helps you have an informed conversation with an engineer without needing to dismantle anything yourself.
What a broken drive belt actually looks like
The drive belt connects the motor to the drum pulley. When it's intact and correctly tensioned, motor power transfers to the drum. When it's worn, stretched, or snapped, the motor runs but the drum stays still. On many machines, the belt is visible through the rear access panel without a full teardown. A healthy belt sits taut on both pulleys; a worn one may look glazed, cracked, or frayed, and a snapped belt will be lying loose at the bottom of the casing. On modern machines, belt access can be more involved than on older designs, so if the rear panel doesn't give you a clear view, stop there.
For a practical overview of drive belt replacement and the symptoms to watch for, the guide covers common indicators and next steps.
Carbon brushes: the small part that kills the motor
Carbon brushes are wear items inside the motor that conduct electricity to the rotating commutator. As they wear down over years of use, the electrical contact becomes inconsistent and the motor loses power. The symptom pattern is recognisable: the machine hums briefly at the start of a spin, then cuts out. Or the drum spins intermittently, completing a cycle one time and stopping the next. Brush motors are common in older and mid-range machines; many newer models use brushless motors that don't have this wear point.
When the fault points to the motor itself
Motor capacitor failure, winding faults, and control board issues are less common than belt or brush problems, but they do occur, particularly in older machines or after a power surge. These faults involve live electrical components and carry a real risk of further damage if misdiagnosed. They need a certified engineer with the right diagnostic tools, not a home repair attempt.
What these repairs actually cost in 2026
Knowing the likely cost of a repair before you book an engineer makes the repair-versus-replace decision much simpler. Here are typical UK figures for the most common spin-related faults:
FaultTypical UK repair costLabour time (approx.)Drive belt replacement£60, £10030, 90 minutesCarbon brush replacement£70, £10060, 90 minutesPump replacement£70, £1101, 2 hoursMotor replacement£150, £4001.5, 3 hoursDrum bearing replacement£150, £300+2, 4+ hours
Some engineers include the diagnostic visit in the quoted repair price, while others charge a separate call-out fee, always confirm the pricing structure when you book. Knowing whether a spin fault is a £70 fix or a £300 job changes the decision entirely, especially when weighed against the machine's age and replacement value.
A common consumer rule of thumb: if the repair costs more than 50% of what a comparable replacement machine would cost, replacement is worth serious consideration. A five-year-old washer with a worn belt is generally worth repairing. A twelve-year-old machine facing bearing replacement, where the drum assembly needs significant disassembly and parts alone can run to £150 or more, is a closer call.
When to stop checking and book a certified engineer
The safe checks above, rebalancing the load, confirming the cycle setting, inspecting the door latch, clearing the pump filter, and straightening the waste hose, cover what most homeowners can do without specialist tools or training. If you've worked through them and the washing machine is still not spinning, or if any of the following apply, hand it over to a professional:
- The drum won't turn even with an empty machine and clear drainage
- There's a burning smell from the motor area, or visible signs of electrical damage
- The machine trips the consumer unit or RCD when you run it
- The fault requires removing the drum assembly, motor, or control board
Attempting these repairs without the right training risks further damage to the machine and, on electrical faults, genuine safety risk. The diagnostic work you've already done is genuinely useful: it narrows the cause, saves the engineer time, and helps you have a more informed conversation about the repair.
Alpha Appliances Ltd are City & Guilds certified engineers covering Greater London, Berkshire, Surrey, Hampshire, and Dorset. Repairs are quoted at a fixed price before any work starts, so you know exactly what you're paying before the engineer lifts a tool. We also offer brand-specific repair pages if you need a specialist visit, for example Amica washing machine repair in Aldwych, AEG washing machine repairs in Aldwych, and Bosch washer-dryer repairs in Aldgate.
From first check to fixed machine: your diagnostic route
If your washing machine is not spinning, work through the checks in this order and you'll identify the cause in most cases. Start with load balance, cycle selection, detergent dose, and the door latch. Move to drainage: clear the pump filter and inspect the waste hose. Then listen for the symptoms that point to mechanical faults, burning rubber for the belt, grinding for bearings, intermittent power loss for worn brushes. Each step narrows it down.
Most spin faults come back to one of the causes covered here. The machine isn't doing something random; it's responding to a specific problem, and that problem almost always has a clear fix. Some of those fixes are straightforward enough to handle at home. Others genuinely need trained hands, the right parts, and proper diagnostic tools.
When you've reached the limit of what's safe to check yourself, Alpha Appliances Ltd offers certified engineers, honest fixed pricing, and a track record of thousands of completed repairs across London and the South of England. Book online or call to speak to someone directly. Get the fault diagnosed, get the right repair, and have clean dry laundry again.
Need a repair today?
Book a visit from a certified Alpha engineer in minutes.