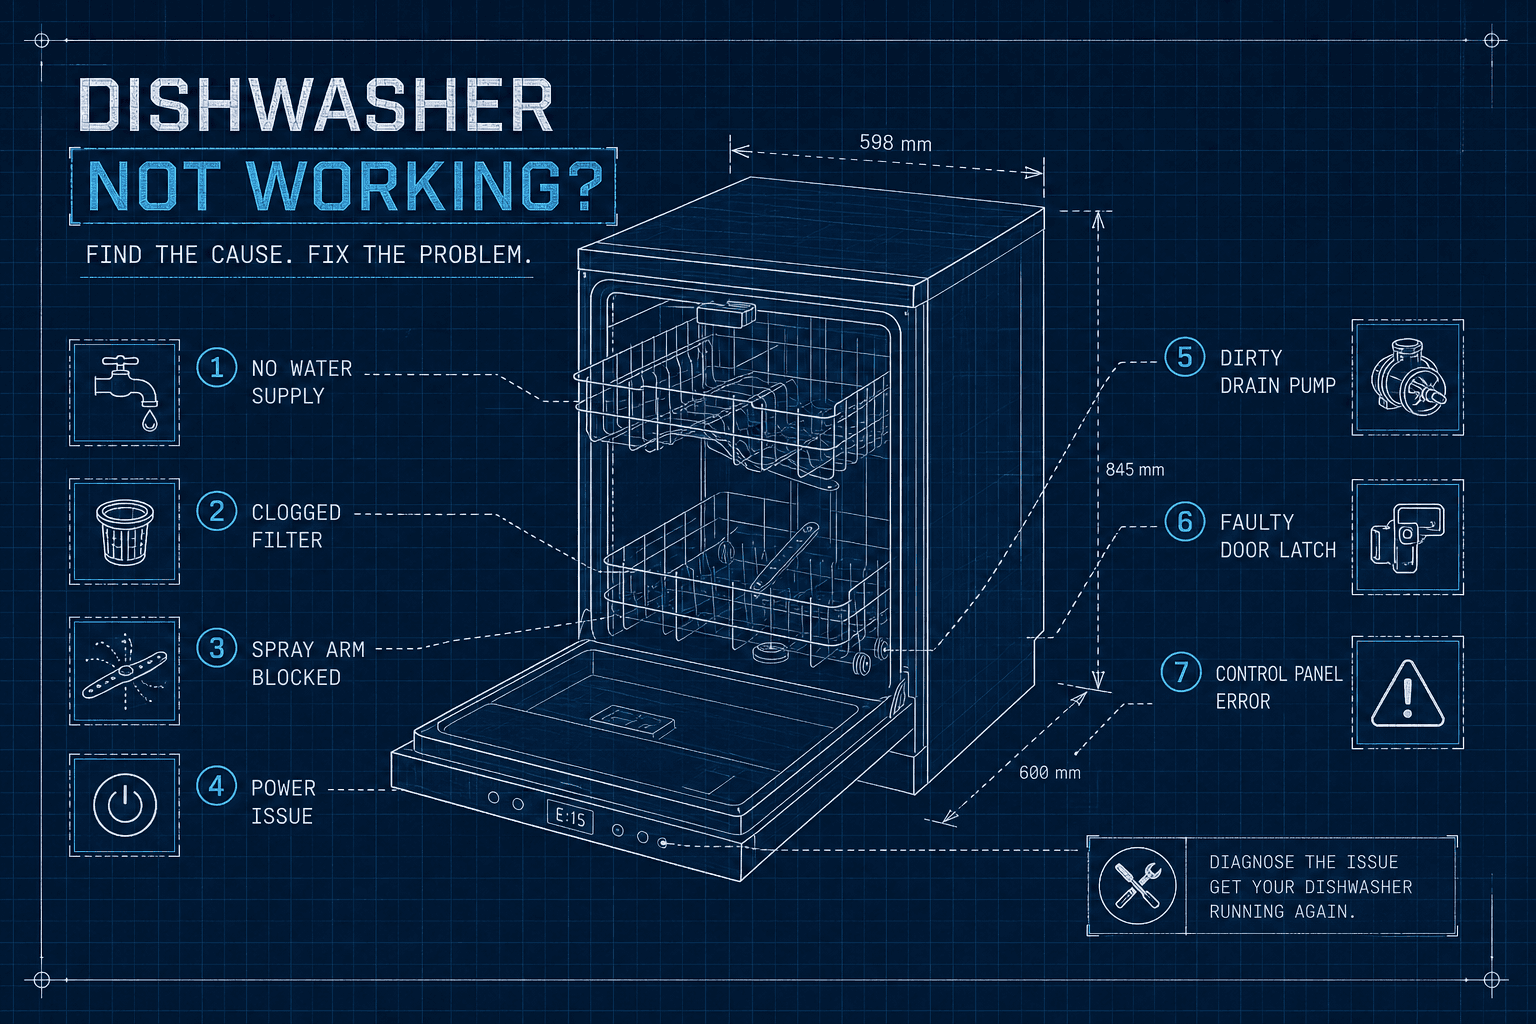
Dishwasher not working? Discover common dishwasher problems, possible causes, and practical troubleshooting tips to help get your appliance running properly again.
Is your dishwasher not working? It always seems to happen at the worst possible time. The machine sits there full of last night's plates, and nothing happens when you press Start. No hum, no water, no cycle. For most households, a dishwasher that stops working is a genuine disruption, and the instinct is usually to assume the worst.
After more than 15 years and over 20,000 appliance repairs completed by the team at Alpha Appliances Ltd across London and the South of England, the same handful of faults come up again and again. Some take two minutes to fix. Others need a certified engineer. This guide is structured symptom-first, so you can skip straight to whatever matches your situation and either resolve it yourself or know exactly when to pick up the phone.
A surprising number of callouts that come through our booking line turn out to be settings issues, not hardware failures. Working through these first saves time and the cost of an unnecessary visit.
Before anything else, confirm the machine is actually receiving power. Check whether the display lights or beeps when you press a button. If there's no response at all, head to your fuse box and look for a tripped circuit breaker. Dishwashers are occasionally wired on a shared circuit with a high-draw appliance like a microwave, and that combination can trip the breaker silently without any obvious cause. Reset the breaker, then try again.
Also check the wall socket itself. Plug something else into it briefly to confirm the socket is live. A loose plug or a faulty socket accounts for more calls about dishwashers not working than most people expect. For additional step-by-step advice about a dishwasher that won't start, see this guide on troubleshooting a dishwasher not starting.
Modern dishwashers have a child-lock feature, usually labelled Control Lock, that prevents every button from responding. It's designed for safety but frequently activated by accident, especially during cleaning. Holding the Control Lock button for three to five seconds usually disengages it; check your manual if the button isn't clearly labelled.
Newly installed machines sometimes ship in demo or display mode, where the panel lights up but no cycle will run. Opening and closing the door, or pressing Cancel, typically exits this mode. Finally, if someone set a delayed start earlier in the day, the machine will sit quietly counting down and appear completely dead. Pressing Cancel or Drain will clear the delay and let you start a cycle immediately.
If the power supply checks out and all settings look normal, the door switch is the next most likely culprit. The dishwasher is designed never to run with an open door, so if the switch fails, the machine behaves as though the door is permanently open, even when it's firmly shut.
The symptom is specific: the dishwasher has power (lights come on, buttons respond), but pressing Start does nothing. Physically, the door may not click firmly shut, the strike plate may have shifted slightly, or the lower rack may have been installed backward and is pressing against the door frame just enough to prevent full closure. Check the rack alignment before assuming the switch has failed.
If the door closes properly but the machine still won't start, the switch itself may have failed. Before reaching for a multimeter, try cleaning the latch mechanism with a soft brush and a little white vinegar. Grime and food residue can prevent the latch from engaging fully. If cleaning doesn't help, a continuity test will confirm whether the switch is working.
Unplug the dishwasher first. Access the latch assembly inside the door panel, disconnect the wires, and probe each terminal pair with a multimeter set to continuity mode. With the latch disengaged, you should read an open circuit. Engage the latch manually and you should get continuity, typically a beep or a reading near zero ohms. No continuity when the latch is engaged means the switch has failed and needs replacing.
Two of the most reported dishwasher problems sit at opposite ends of the same cycle: the machine either won't take in water at all, or it finishes a programme and leaves standing water at the bottom. Both are worth diagnosing together because their root causes overlap.
Start with the shut-off valve under the sink. It sounds obvious, but it's been accidentally knocked closed more times than you'd think, particularly after other kitchen work. Turn it fully counterclockwise and run a short cycle to confirm water is flowing. If the valve is open and the machine still won't fill, check the float switch. This small plastic dome or cylinder sits at the base of the tub and acts as an anti-flood device. Food debris can jam it in the "full" position, tricking the machine into never opening the inlet valve. Lift it gently and clear any debris from around it.
If the float switch is clear, the inlet valve itself may be faulty. It sits behind the lower kickplate where the water supply hose connects. Inspect it visually for scale or blockages, then test the solenoid with a multimeter set to ohms. Most inlet valve solenoids should read between 1,000 and 3,000 ohms. A reading of zero or an open circuit means the valve needs replacing. For more detail on diagnosing water-fill faults see the dishwasher not getting water guidance from Maytag.
The cylindrical filter at the base of the tub is the first thing to check for drainage problems. Twist it out, rinse it under hot running water with a soft brush, and clear any grease or food debris. This alone resolves the majority of standing-water complaints, and cleaning it monthly prevents the problem from returning. For step-by-step cleaning instructions, read how to clean your dishwasher filter.
If the filter is clean and water still isn't draining, inspect the drain hose at the back of the machine. Check for kinks, blockages, and whether the high-loop setup (which prevents water from siphoning back into the tub) is still intact. If the dishwasher drains into a garbage disposal, run the disposal first to clear it, and on new installations, confirm that the knockout plug inside the disposal inlet has been removed. That plug is frequently missed during fitting and will block drainage entirely. If the drain pump runs but produces no movement, the pump motor may have failed and will need professional assessment.
E15 means the flood protection switch in the base tray has been triggered. Before running another cycle, tilt the machine slightly forward with the power off and mop out any water from the base tray. Then clean the filter and sump thoroughly.
E24 and E25 both point to a drainage blockage, with E25 specifically indicating an issue at the drain pump or check valve. In most cases, cleaning the filter, checking the hose, and clearing any obstruction from the pump impeller resolves it.
E09 indicates a heating circuit fault, which usually means a failed heat pump or heating element. A power reset (breaker off for 30 seconds) is worth trying first, but E09 that returns after a reset typically requires a replacement part.
Both brands use an F-E code system. F5-E1 points to the door latch or switch, F6-E1 to a water fill problem, F8-E1 to a drain pump issue, and F7-E1 to the heating element. These codes indicate where in the cycle the fault occurred, not necessarily that the named component has failed outright. Always run a full power cycle reset before acting on a code: disconnect the machine for five minutes, restore power, and run a test cycle. Temporary sensor errors often clear without any further intervention.
The checks covered so far are accessible to most homeowners. The faults in this section require more confidence with a multimeter, or an honest assessment that professional diagnosis is the faster, cheaper route.
The thermal fuse is a one-time safety device, usually located inside the door console near the control board, that cuts all power if the machine overheats. When it blows, the dishwasher appears completely dead: no lights, no response, nothing. Locate the fuse by removing the inner door panel, disconnect its two wires, and probe each terminal with a multimeter set to continuity mode. Continuity means the fuse is intact; no continuity confirms it has blown and must be replaced. A fuse that keeps blowing after replacement points to an underlying overheating problem that needs investigating before fitting another.
The control board is the last component to suspect after everything else has been ruled out. Symptoms include erratic behaviour across multiple functions, buttons that respond inconsistently, error codes that don't match any identifiable fault, or a cycle that starts and stops without completing. Control boards are expensive, and misdiagnosis means paying for a part you don't need. At this stage, professional diagnosis is genuinely the more cost-effective option.
We cover local areas across the capital, including dedicated same-day coverage in Battersea same-day appliance fix services and nearby neighbourhoods such as Colindale appliance faults support. The online booking form takes under two minutes to complete. If you'd rather speak to someone directly, our team is available by phone. There's no obligation on diagnostics, and you'll know the cost before any work begins.
Working through problems in a logical order, from settings and door faults through to water supply, error codes, and electrical components, resolves most dishwasher issues faster than random guessing. The key diagnostic checkpoints are: power supply, control settings, door latch, water fill and drain, error codes, thermal fuse, and control board. That sequence covers the overwhelming majority of faults.
A dishwasher that stops working is rarely a write-off. Most machines under ten years old are worth repairing, especially once the fault has been correctly identified rather than assumed. Repair is almost always the more cost-effective and environmentally sensible choice compared to replacement.
If the checks in this guide haven't resolved the problem, and your dishwasher is still not working, the next step is a certified engineer, not a trip to the appliance showroom. Book a next-day repair with Alpha Appliances Ltd and have the machine assessed by a certified engineer who will give you a clear answer on whether it's worth fixing and exactly what it will cost.
Book a visit from a certified Alpha engineer in minutes.
TRUSTED BY HOMEOWNERS
Fast, reliable, and warranty-backed repairs for every major brand.
Discover more tips from Alpha engineers.